Showing posts with label painted feature wall. Show all posts

Monday, September 20, 2010

Final Entry

Probably.  Yep, Probably Final Entry.

Okay, well I still need to do something with that 80's light, and I might change out the rug, but for now let's just consider it done.  :)


The door with the windows is actually our front door, with the other door leading to the garage.  I like that you can't see our hooks and mess from the front door, but it is still easily accessible.

Let's take a closer look, shall we?


There are two double hooks on the top coat rack, and three single hooks on the bottom rack, as seen in this unadorned version.


I envision my husband and I using the taller rack this winter, and our boys using the bottom rack.   It is at just the right height that they should be able to hang up their own backpacks and coats.

The ledge is perfect to hold library books that need to be returned.


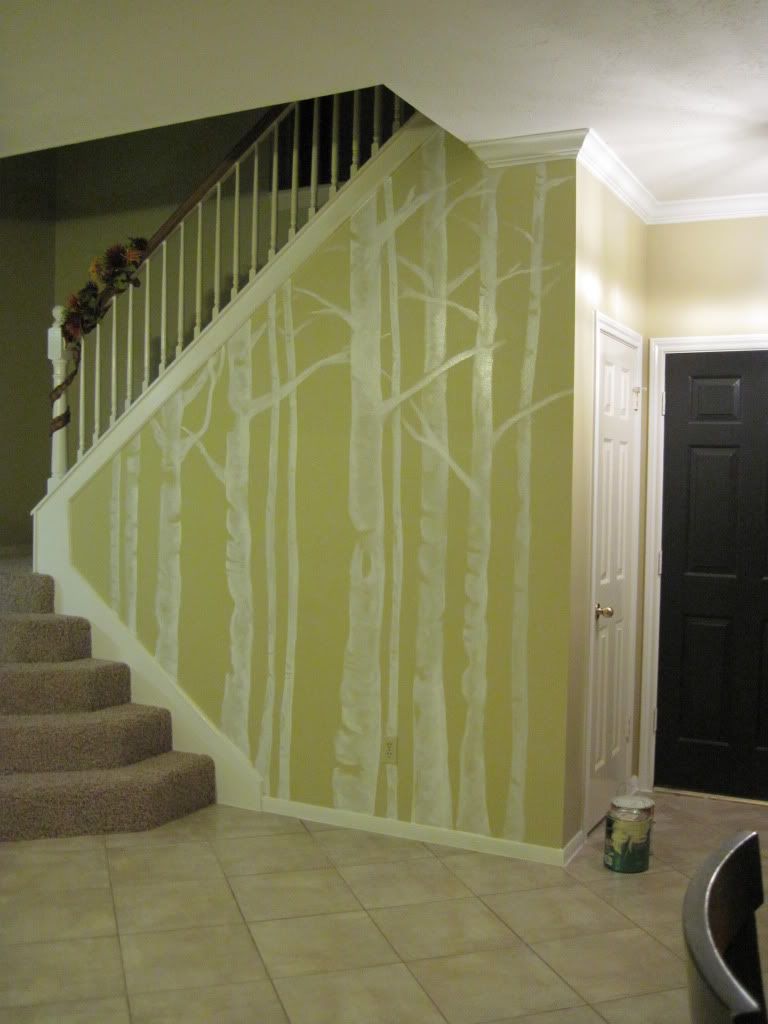
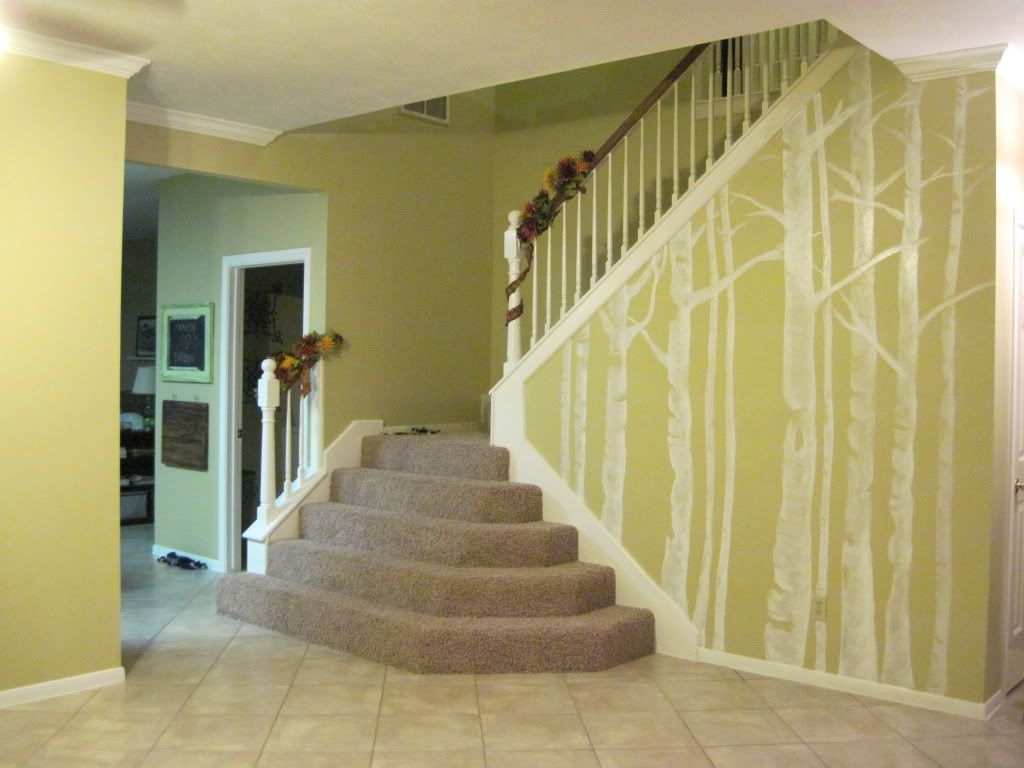
I wrapped the mural around the two small walls, from the staircase wall.


A few of the limbs are carried over onto the front door wall.


Comfy place to sit....   Check.

Place to hang your hat..... check.


Something different and unique... check.


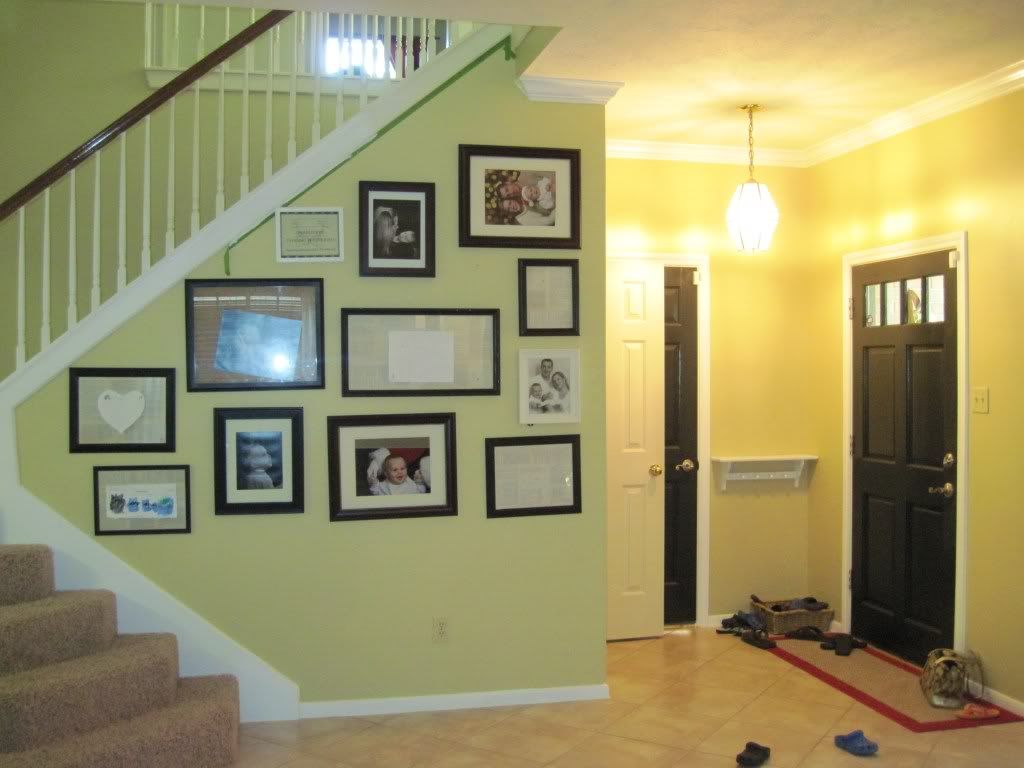
And, finally, a little glimpse at what this space looked like on closing day:


Definitely 'Ours' now.   :)


Thanks for looking!!

-Courtney

Linking up to:


mmm button
Join us Saturdays at tatertotsandjello.com for the weekend wrap up party!
Funky Junk's Sat Nite Special


Friday, September 3, 2010

Birch Mural, Entry Redo

Day one of the Entry Redo, Redo.  :)

Please excuse the bad lighting.  These were taken tonight, with no natural light, and very dim artificial.


So, when I left the entry last, it was looking sort of like this, at least the main stairway wall was:


I decided, the photo wall (even considering the messed up state it was in) just wasn't going to do it for me.  I might eventually add 3 large photos back, but the rest will go elsewhere (repainted and refilled, of course).

So, first I removed the photos and was left with a clean slate looking something like so:


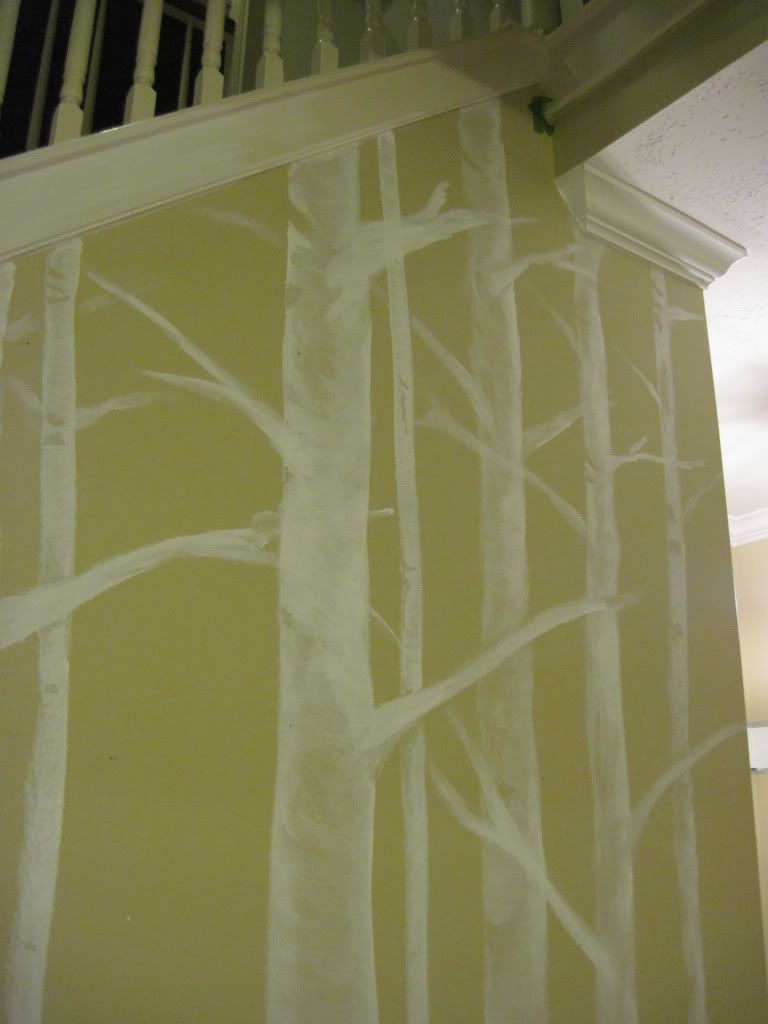
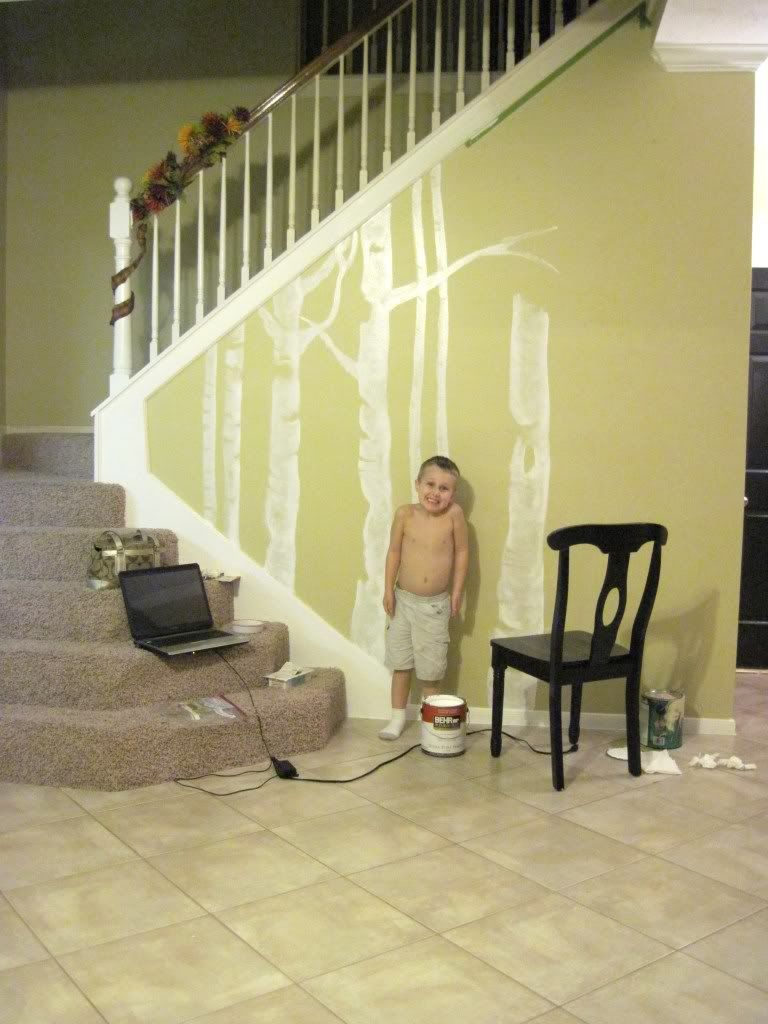
Without stirring the paint, so it was sort of soupy, I just started painting on the trees.  I then used q-tips and paper towels to quickly remove the paint to make the crevices.  I also used the natural marks left by the brush to my advantage, letting them work as bark-like texture.


I then went back and added another coat of white to create highlighting where wanted.


I plan to continue this around the entry way, but for one evening of work so far, I am REALLY happy with the way it has turned out so far.


And one with my little helper, just for good measure.  :)


Thank goodness for a perfectly timed long weekend.  Yay!  :)

Linking up to:


Funky Junk's Saturday Nite Special


Photobucket


Life in the Fun Lane
 
 
mmm button
C.R.A.F.T.
 

Wednesday, August 25, 2010

Shared Bedroom for boys


I'm taking a little detour from the Nursery project, basically because my next step is to finish the bumper bad and it's become a royal pain in the you know what.  And, procrastination is indeed my middle name.  Okay, not really, but you know.

So.. here is a tour of the bedroom shared by my 4 and 5 year old sons. 

When we bought the house, it looked like this. 


Lavender and Rose border isn't really our style, and it certainly wasn't fit for two boys.

Below is how it looks now... We replaced the worn out light fixture with a new ceiling fan.  Notice the twine pull, so that they can reach the light!  haha!


They have some-what of a feminine rug, because I confiscated their old rug for the Nursery.   Below is an older photo (older by a few days! ha!) that shows their older, more boyish rug. 


My Step-mom and I found that rug at a Pottery Barn outlet over 4 years ago, when I was busy decorating my 4 year old's then nursery.  Oh the memories.  :)

Anyhoo,
This room is a mishmash of things we already had, with exception of the beds, the duvets, and their dresser.
The beds were an inexpensive bunkbed purchase from Walmart.com.  The total cost was around $190, and for TWO beds (two extremely stable, solid wood beds), you can't really beat that.  They easily hold adults and we've actually used them for visitors before.

The duvets are from IKEA, as is their dresser (from the as-is section.  Cha-ching for almost $100 off sticker).


All of the firetruck decorations were originally used in one of the bedrooms at our old house.  I finally brought them all out of storage a week or so ago. 


When I bought the following picture, I originally saw it in an online store, beautifully framed and I fell in love with it.  I HAD to have it for our firetruck nursery, at the time.  However, at $200+ it was out of my price range.   I searched ebay, and found someone selling the poster for around $15.  Then I just bought a frame to fit.  The old frame actually broke in the move, so this is the second one, but it was still SUCH a bargain.

Every little boy has to have a night-night flashlight, right?  :)

Thanks for looking and for any comments!


Sunday, August 22, 2010

Nursery Wall - singular.

We're expecting another bundle of roughness and toughness this November.  Ahh, 3 boys.  Our lives will never be the same.  :)

When we bought our house in March, we had no idea we were in the very early stages of pregnancy, so our house shopping criteria didn't come close to thinking of a wee-one.
A few weeks after closing- SURPRISE! :)

So, since all of our secondary bedrooms are upstairs, we're doing a "Nursery Nook" in our Master Bedroom downstairs. Just the thought of trudging up those stairs 3 to 4 times throughout the night, after another c-section makes me hurt.  :p

We're not wanting to totally baby out the room, so we're choosing to do decor that goes with what we currently have - but fun and whimsical for a child.  When I do get ready to move the baby to his own room sooo far far away from us, everything should be pretty easy to relocate.  Okay, except for THIS project.  haha.

I've already posted about the dresser remodel (which, by the way isn't even going in our room due to space constraints, but anyhoo), so here is the next chapter in the "Nursery Nook" saga:  The Nursery Wall - singular, because the kiddo only gets one wall his little little Nook.  :p  Okay, one and 1/8th.

Here is the wall before:
Ignore the funky chair and ottoman waiting to be slipped, and obviously the crib is not "dressed."

First of all, I'm obviously way to in love with the print on these curtains (below) for my own good, because I keep buying them, only to chop them up to use all over the house.
AHHH... okay, it appears that they aren't for sale anymore online to steal a photo from.  :(
but it is the same fabric I used for the curtains under my sink.

and for the curtains under a buffet, and for the curtains in my laundry room...
......and, in frames above our bed, and... for part of the baby's bedding I'm working on.

Yep, I like the fabric.  LOL.

So I decided that I SOMEHOW wanted to put this pattern on the baby's wall.
I thought about doing vertical stripes.. eh, too busy.
I thought about doing large Stars with the stripes inside...
Nice, but man that would be a lot of work to make perfect stars.

So, I settled on doing large circles, with the pattern inside.

I started by using a pen and string (high tech, here  :p ) and making various size circles on the wall.

I then taped off the stripes so that it mimicked the pattern on the panels.


Then came the paint.


I started with the darkest color, let it dry, and then went back and taped off the other colors.  From the beginning I planned on changing the wall color, but I thought I could use it as one of the colors of the stripes for this process.  However, it ended up looking just plain gray against the other colors rather than aqua.. so it all went in the end.

Here is the finished wall:


I'm really liking that it's fun, yet it doesn't scream BABY at us.  Especially since our king size bed looks directly at this wall.  


Thanks for looking, and for any comments!  :)  Edited to add:  check out the sidebar label for nursery to see other projects relating to this area.

Related Posts Plugin for WordPress, Blogger...
My Zimbio My Ping in TotalPing.com